I’ve always been a bit of an electronics geek. I got that tendency honestly; my father was a tinkerer, too, and quite adept with things electronic. Aside from building the occasional audio interface device or cable, though, in the last few years I haven’t had the opportunity to do much.
Back in 2005, I sat down with a breadboard and some components and set about building a set of sensitive differential amplifiers. My goal was to use my Fluke Scopemeter to display an actual Lead II EKG waveform. It took a good bit of trial-and-error work to get a stable amplifier with an acceptable noise floor, and to design a low-pass filter that would rid me of the RF noise that’s so rampant in any building or home. I eventually did get it to work. I found myself to be in sinus rhythm, which after a while is actually kind of boring. That’s as far as that project went.
I’ve been reading for a few months about a new class of microcontroller board called the Arduino. There have been microcontroller development boards available to experimenters for years, of course. Parallax has one called the BASIC Stamp, and in the UK, Revolution Education makes the PICAXE line. There are a host of others, but until now they’ve all shared two key disadvantages. They’re all somewhat expensive, and they’re all proprietary. In addition, none of these products has gained significant standardization or market traction, meaning that there’s little community support available for people working with them.
Arduino changes all that. Arduino boards, built around a series of microcontroller chips from Atmel called the ATMEGA, have their hardware, firmware, and software designs published under a Creative Commons license. You can download the plans for the board in Eagle CAD format and build your own — or even breadboard or custom-build your own design. There are several companies already selling Arduino-clone boards with their own improvements. Likewise, source code for all of the programming software and firmware can be downloaded and modified to your needs, free.
I’d been thinking of playing with an Arduino for months, but what finally tipped the scales was a random stop at Radio Shack on January 1. I was driving by and thought I’d see what was new, so I wandered around inside. The display of BASIC Stamp stuff caught my eye, and below it … Arduinos! I could scarcely believe my eyes. The basic board was priced at $30 … I bought one on the spot.

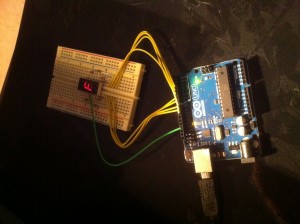
I had a breadboard and a handful of components, so I immediately went home and started to tinker. The programming language used is strikingly similar to c and c++, so I was right at home. I cobbled together a program to blink some LEDs in interesting patterns. That got boring, so then I wired up a 7-segment LED display and worked out a way to make it count from 0 to 9. That wasn’t enough, so I added a few maps and had it count from 0 to F in hexadecimal.
One of the interesting features of the Arduino board is that its physical design is “standard.” The header sockets for the digital and analog pins, as well as those for power, ground, and serial I/O are all in precisely specified locations, enabling daughterboards called “shields” to mate with the main microcontroller board. I built a little prototyping shield from a kit I got from Amazon for $10 and designed a little multi-color LED light bar on it. A couple of hours later I had it flashing and blinking like a police car from outer space. This was getting to be far too much fun. I wondered if I could do anything practical, or anything that at least seemed practical.
On another foray through Amazon, I found an interesting shield with a two-line LCD display and a five-button keypad. That looked like fun, and at $18 was a minimal risk. Â I ordered that, too, and it came in a couple of days ago.
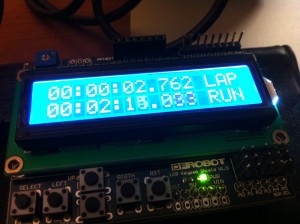
The clock oscillator on the Arduino Uno board I have seems very stable and accurate, and the Arduino firmware keeps a tick count (expressed in milliseconds) available. I wondered if I could set up a stopwatch?
What followed was a really enjoyable learning experience. Think about what goes on inside a stopwatch. Buzzing in a tight loop, the processor has to update the current time, format it for output, display it, scan for keyboard input, and act on incoming commands. Button inputs have to be debounced so we don’t get pesky double-presses.
It took a couple of hours to get it right. I was going to post the code here, but the style sheet for this blog seems to really have issues with my lovely bracing style. I’ve put the file here for your enjoyment, and here’s a photo:

Permalink
nice! I had a brief foray into arduino to read a midi clock and pulse two LEDs in time. Most satisfying and they do seem to have taken the pain out of embedded prototyping don’t they!
Permalink
Tank,very nice this project,perfect work!
Bravissimo!